



To make filigree nails, you paint black and nude gel polish bases, apply matte top coat to the nails that will carry artwork, then paint fine curling filigree lines in black over the matte surface, working from a reference image. In this tutorial Kirsty removes Vanessa's old winter nails and gives them a complete redesign.
This tattoo inspired filigree nail design came from a tattoo Kirsty saw on Instagram from @bodyartmag.
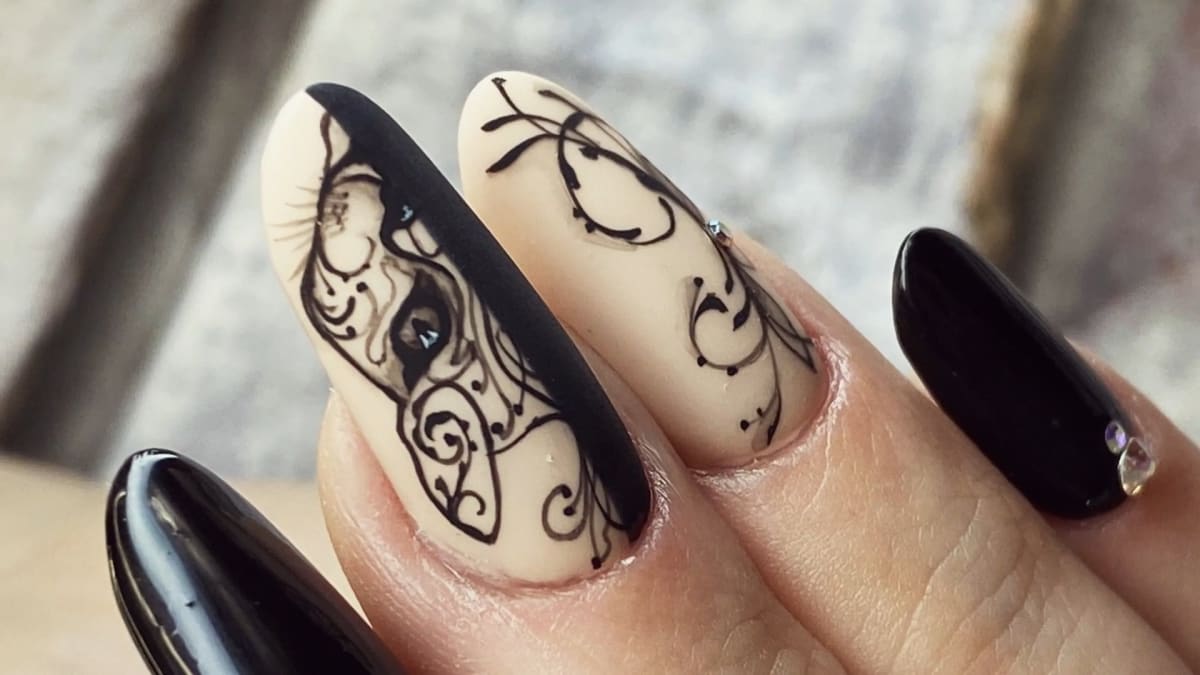
The set uses Serious Black and Sheer Elegance with black for the filigree artwork, finished with a matte top coat and a little bling.
Update: Kirsty used black polycolour paint for the filigree in the video. Urban Graffiti gel polish is now so highly pigmented that you no longer need paint. Use Serious Black gel polish for the artwork and cure layer by layer.
At a Glance
- Design: filigree nails with black line artwork on matte and glossy nails
- Artist: Kirsty
- Technique: acrylic infill, gel polish colour and hand-painted fine line work
- Key products: Natural Beige Cover Pink Acrylic Powder, Maximum Adhesion Primerless Acrylic Liquid, Serious Black, Sheer Elegance, Urban Graffiti Ultra Matte Top Coat, Urban Graffiti Top Coat, AcryGel Tube - It's Clear Dear
- Video length: about 27 minutes
Why You'll Love These Filigree Nails
- An intricate look that makes a simple set more spectacular
- Shows how to remove old nail art and re-balance the nails
- Matte and shiny finishes in one set
- Easy to adapt from a reference photo
How the Filigree Artwork Is Planned
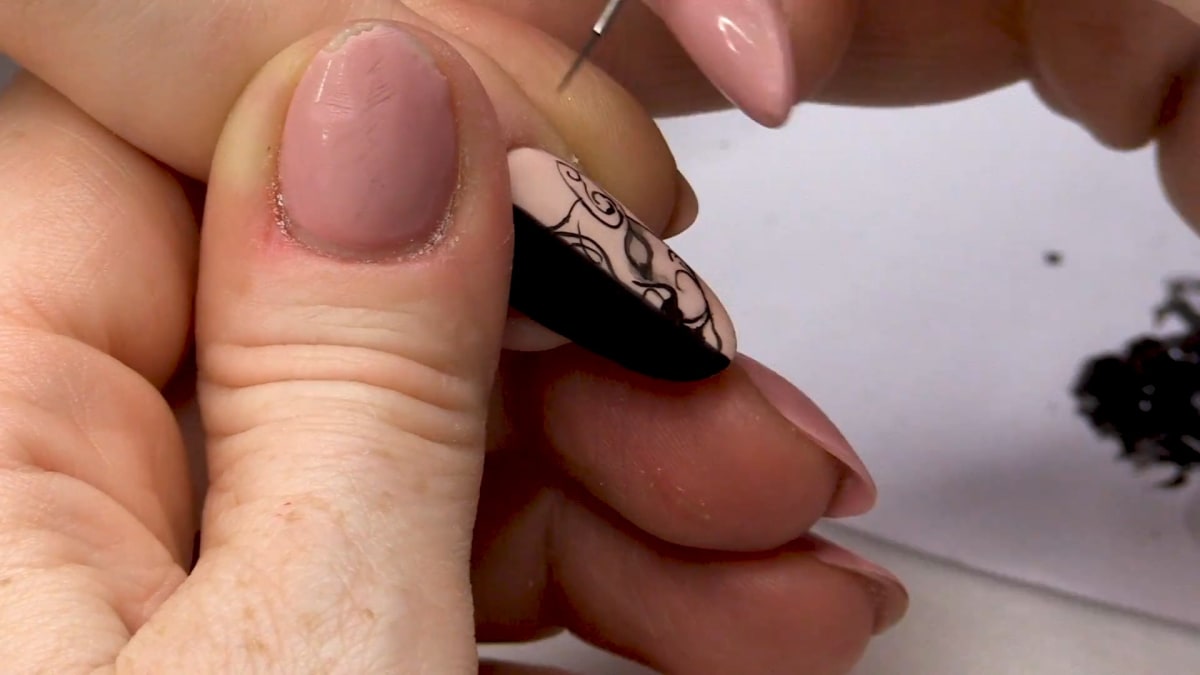
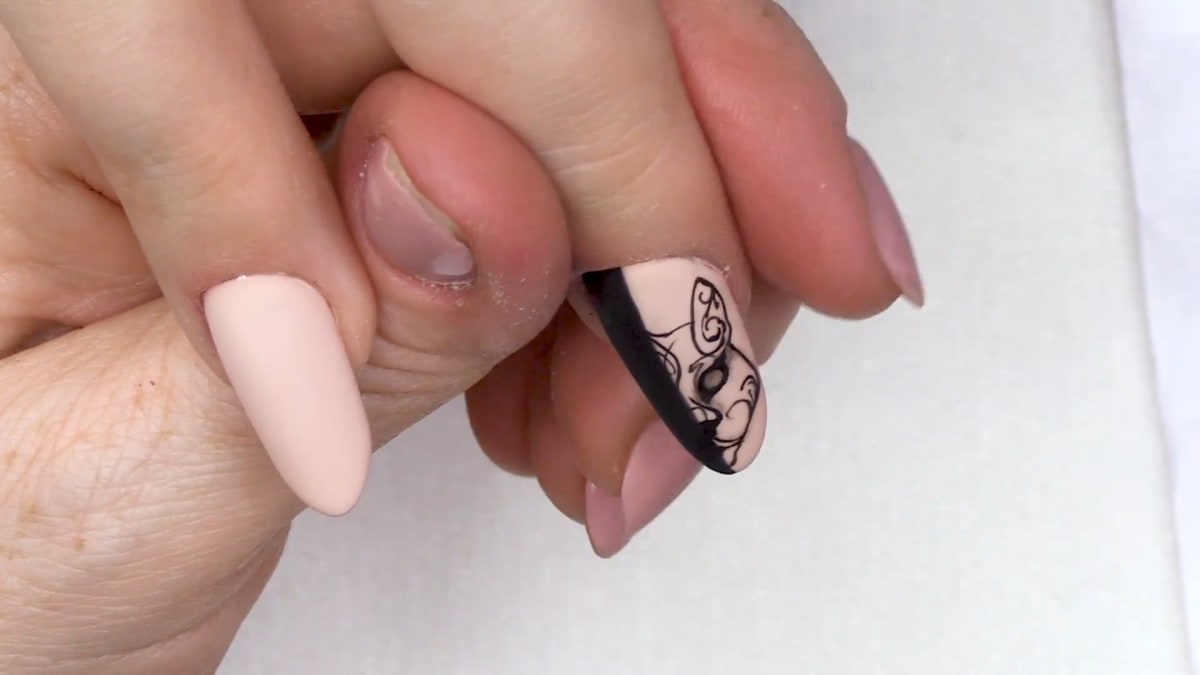
Fine, flowing line work is hard to place by eye, so Kirsty works from the reference image and fixes one marker point first, such as the chin and the top of the head on the middle finger design. With that in place, the rest of the lines have something to fit around. The ring finger takes its inspiration from the same filigree, so the two nails relate without being copies.
The surface is prepared for it too. The nails that will be painted get Ultra Matte Top Coat first, so the artwork sits on a matte surface, while the plain nails get the tack-free shiny top coat. That split between matte and gloss nails is part of the look as well as a practical step.
Products Used in This Video


How to Create Filigree Nails
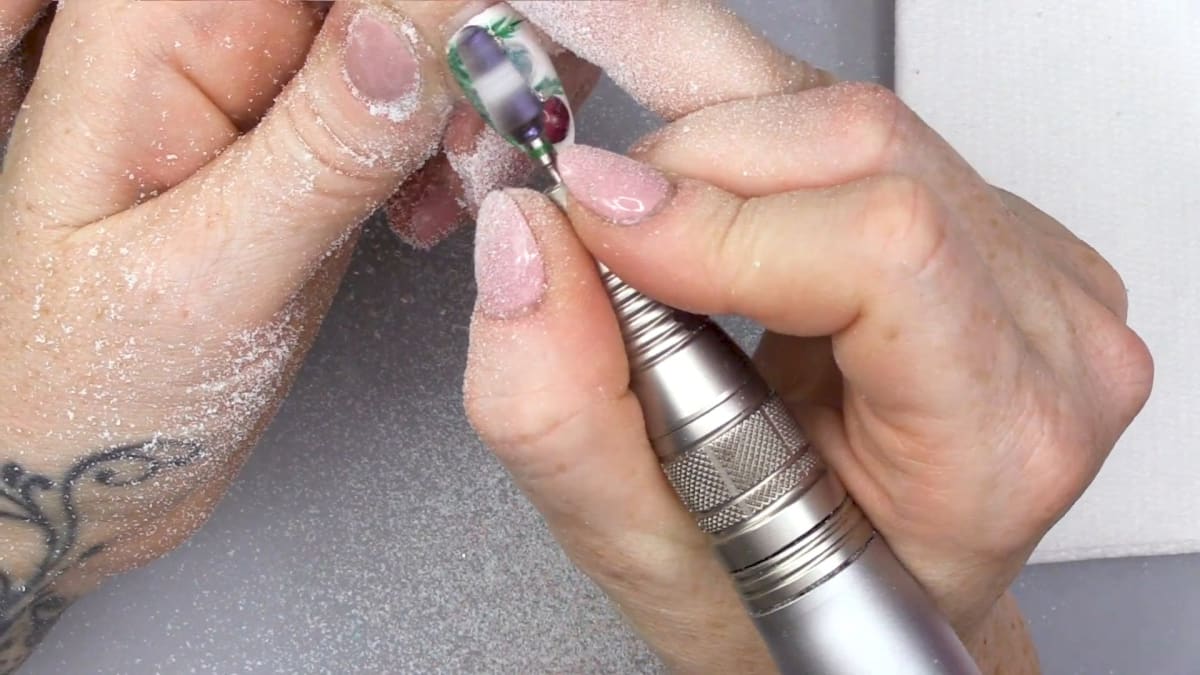
1. Remove the old nail art
Remove the old nail art with an e-file. Take off the sharp edges with a 180 grit file, which is softer than an 80 grit and removes enough product without much filing. Watch this step at 2:00
2. Infill and re-balance
Use Natural Beige for the infill and keep the apex in the back third of the nail. Kirsty reinforces it where it had jumped up, then buffs the nails. Watch this step at 6:00
3. Apply the colours
Use half and half Serious Black and Sheer Elegance on the middle finger, Serious Black on the pointer and pinky, and Sheer Elegance on the rest. Apply two coats of each colour. Watch this step at 10:00
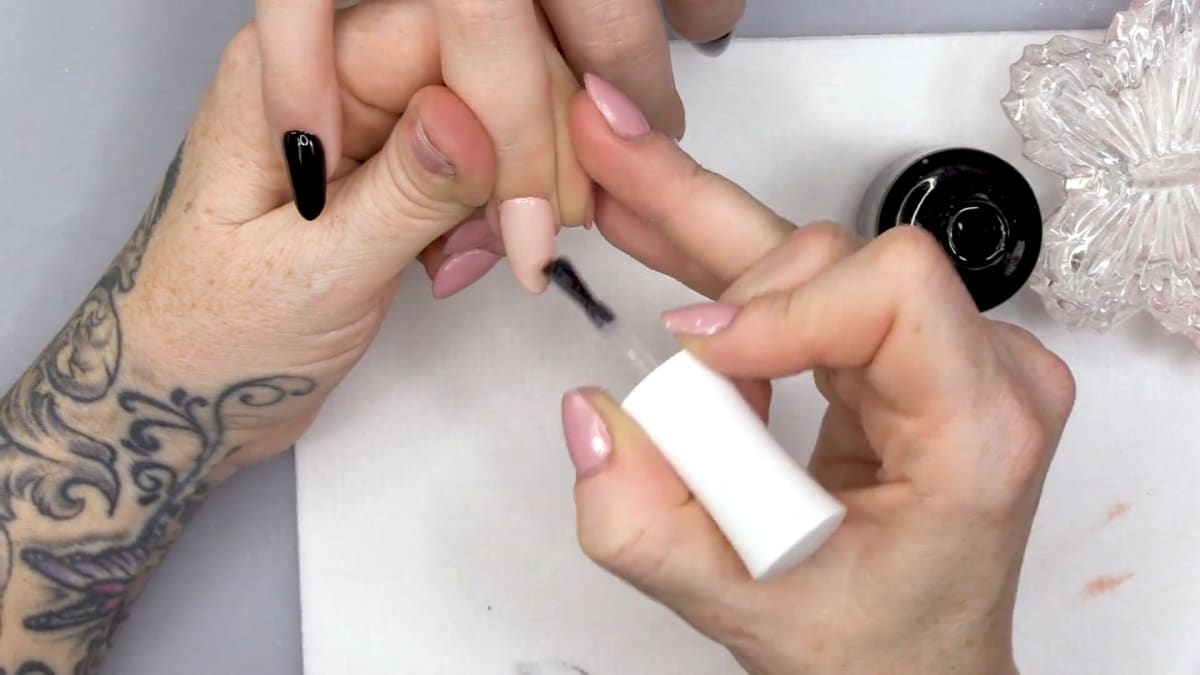
4. Choose the finishes
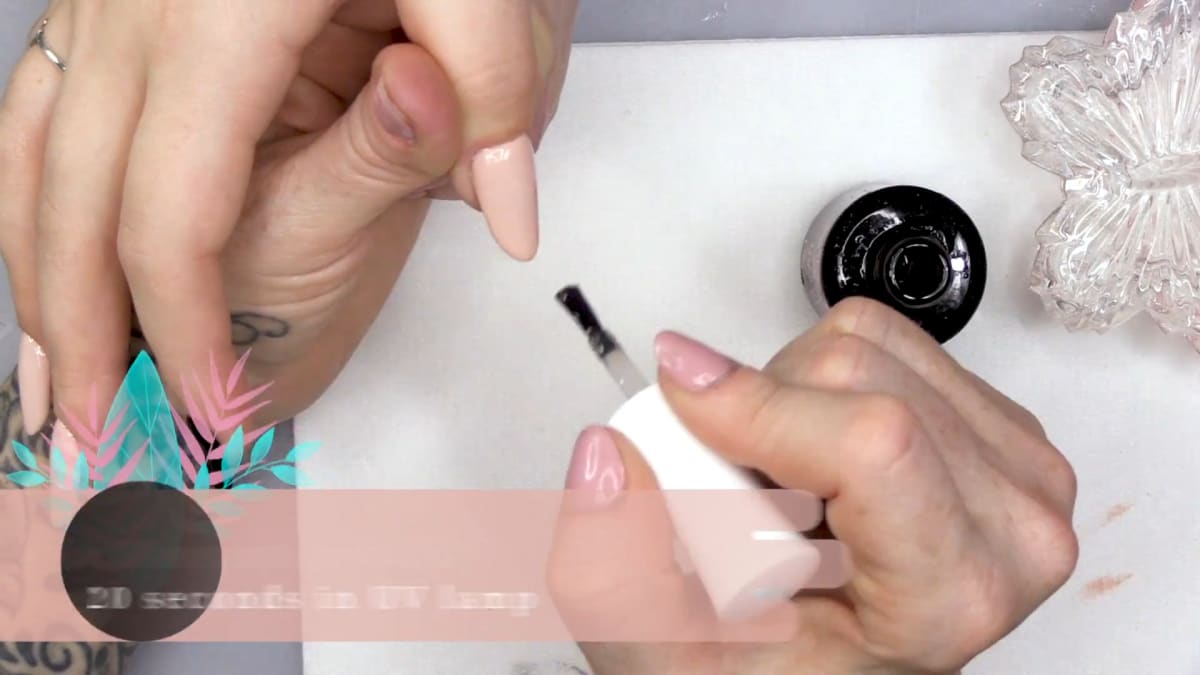
Use Ultra Matte Top Coat on the nails you will paint, so the artwork sits on a matte surface. Use the Urban Graffiti Top Coat, which is tack-free, on the rest for a shiny finish, and cap the edges to seal the gel to the extension. Watch this step at 13:00
5. Paint the filigree
Use Serious Black gel polish and the reference image for the middle finger design, starting with a marker such as the chin and top of the head so the rest fits in. Cure layer by layer. Take inspiration from the filigree for the ring finger. Watch this step at 16:00
6. Add bling and oil
Place a little AcryGel, move it around with Gel Residue Wipe Off Solution on the brush, add shiny top coat and press the stone in. Finish with cuticle oil. Watch this step at 23:00
Where to find each stage of the Filigree Nails video
| Stage | Time |
|---|---|
| Removing the old nail art | 2:00 |
| Infill and re-balance | 6:00 |
| Applying the colours | 10:00 |
| Matte and shiny top coats | 13:00 |
| Painting the filigree | 16:00 |
| Bling and cuticle oil | 23:00 |
Pro Tips
- Use matte top coat under the artwork so it sits on a matte surface.
- A 180 grit file is gentler and enough for taking off edges.
- Cap the edges when applying top coat.
- Use a marker point on the design so the rest fits in.
Who Is This Design For?
This design is for fans of tattoo style art and nail techs who want to practise fine painted detail. If you like tattoo inspired nails, any line drawing you love can be adapted in the same way.
Ways to Make It Your Own
- Use your own reference image
- Choose different colours for the base
- Keep the bling small or leave it out
Aftercare
Keep cuticles moisturised with oil daily and avoid using nails as tools, to look after your filigree nails.
Frequently Asked Questions
How do you paint filigree nails?
Apply the base colours, put matte top coat on the nails to be painted, then paint the filigree in black gel polish from a reference image, starting at a marker point and curing layer by layer.
Do I need acrylic paint for the filigree?
No. Urban Graffiti gel polish is highly pigmented, so you can paint with Serious Black and cure layer by layer.
Which file removes the edges?
A 180 grit file, which is softer than an 80 grit.
Where did the design come from?
It was inspired by a tattoo Kirsty saw on Instagram from @bodyartmag.
Why matte top coat before the artwork?
So the artwork sits on a matte surface.
Which nails are black and which are nude?
The middle finger is half Serious Black and half Sheer Elegance, the pointer and pinky are Serious Black, and the rest are Sheer Elegance.
How is the stone attached?
It is pressed into a little AcryGel with shiny top coat over it.
Give Filigree Nails a Try
Watch the nail art tutorial above, then try your own filigree design and share your results.


