



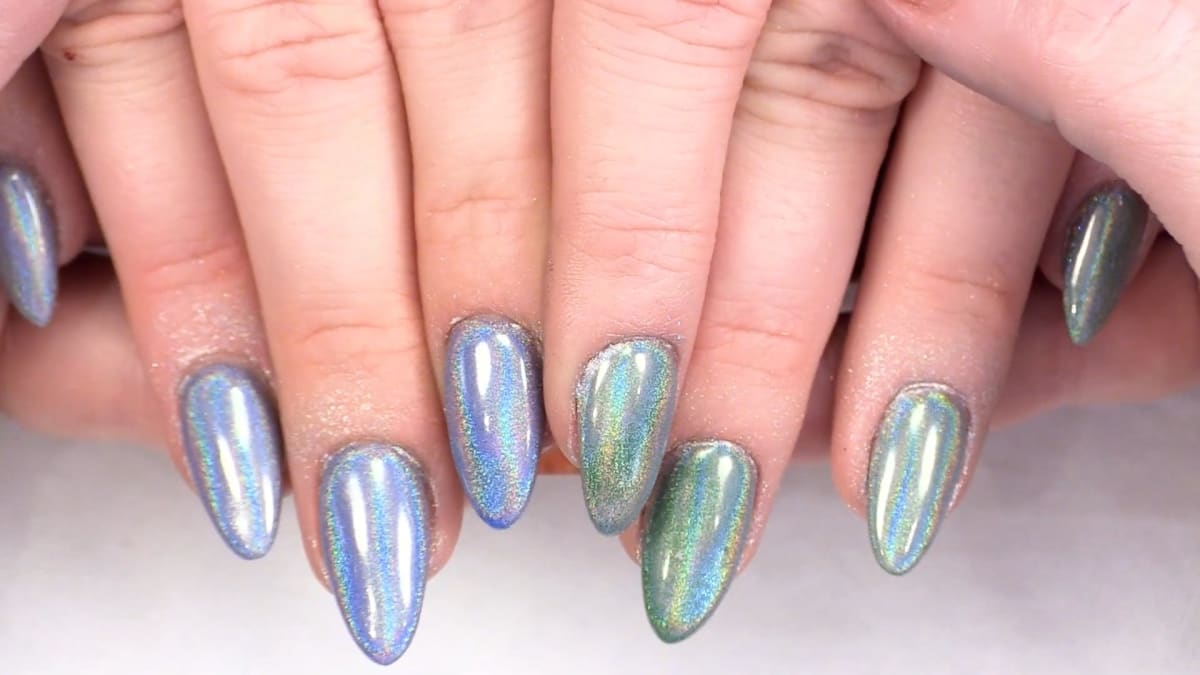
Holo chrome nails are made by rubbing holographic chrome pigment powder onto a cured top coat with the sticky layer removed, then sealing it in. Kirsty Meakin from Naio Nails shows the powder over green and blue gel polish, and compares it with a nude and a black base.
The powder shows up as a rainbow effect and the colour underneath shines through, so you can use this holographic chrome pigment over any colour.
Below is each stage in order, with the time to watch it in the video.
At a Glance
- Design: a rainbow holographic chrome finish over gel polish
- Artist: Kirsty
- Technique: pigment powder rubbed onto cured top coat
- Base colours shown: green, blue, nude and black
- Skill level: easy
- Key products: Top Coat, holographic chrome pigment, Gel Residue Remover, Cuticle Oil
- Video length: about 10 minutes 20 seconds
Why You'll Love Holo Chrome Nails
- A rainbow effect over any colour
- Works over pale and dark bases
- Needs only the tiniest amount of pigment
- Easy to clean up with the sticky layer wipe
How Holo Chrome Pigment Sticks
The pigment does not stick to colour; it sticks to the top coat. That is why the top coat has to cover all of the colour, right into the sides. Anywhere it is missed, the powder will not hold. Once cured, the sticky layer is taken off with a dry lint free pad, and the powder is tapped on and gently rubbed in, which sits all the particles flat.
The second coat matters just as much. The chrome powder is only held on the surface until it is sealed from cuticle to tip, so if you skip the seal you will take the pigment off again when you wipe.
Products Used in This Video


How to Create Holo Chrome Nails
1. Clean the nails
Clean the nails so they are completely clean, with no oil on them.
2. Apply top coat
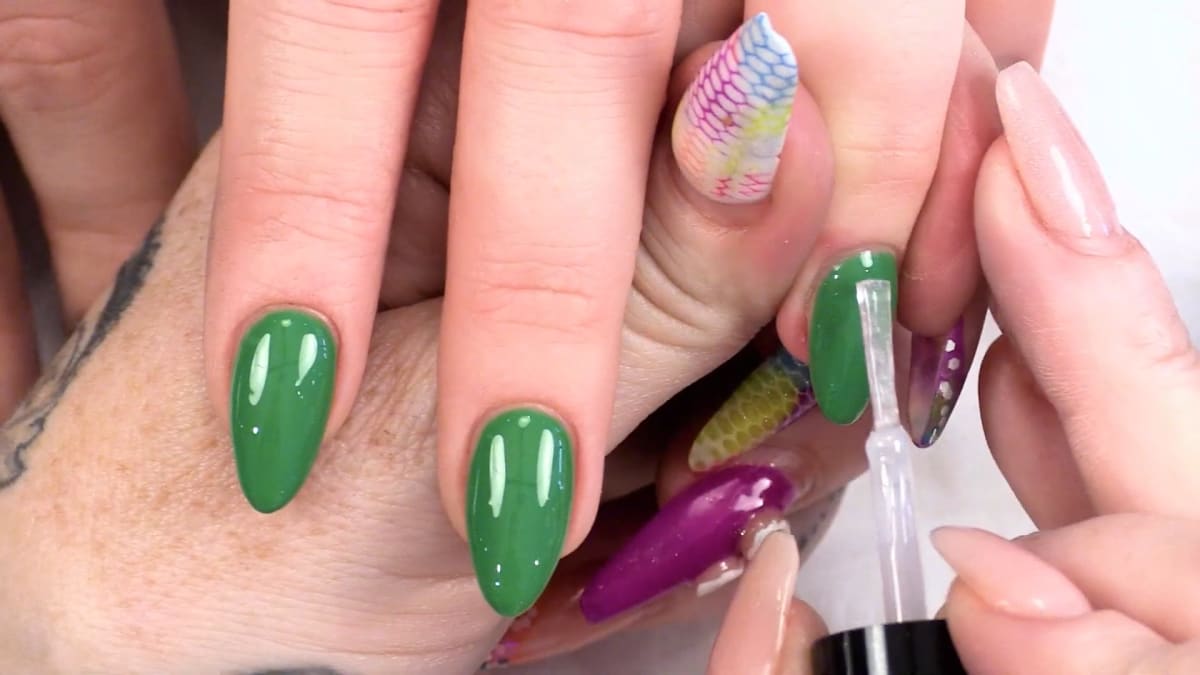
Apply Top Coat over all of the nails, covering all of the colour. This product is what adheres the pigment, so if you miss a bit, such as the sides, the powder will not stick there. Cure.
3. Remove the sticky layer
Use a dry lint free pad, with nothing on it, to remove the sticky layer. Cotton wool would leave particles behind.
4. Apply the pigment
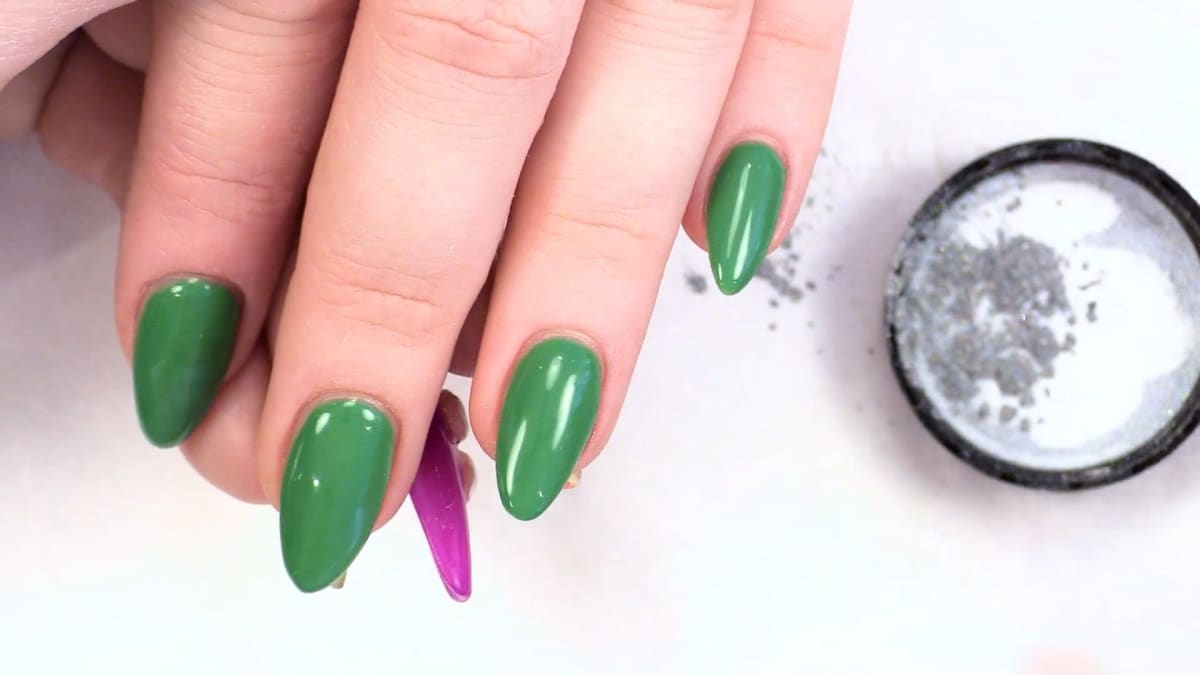
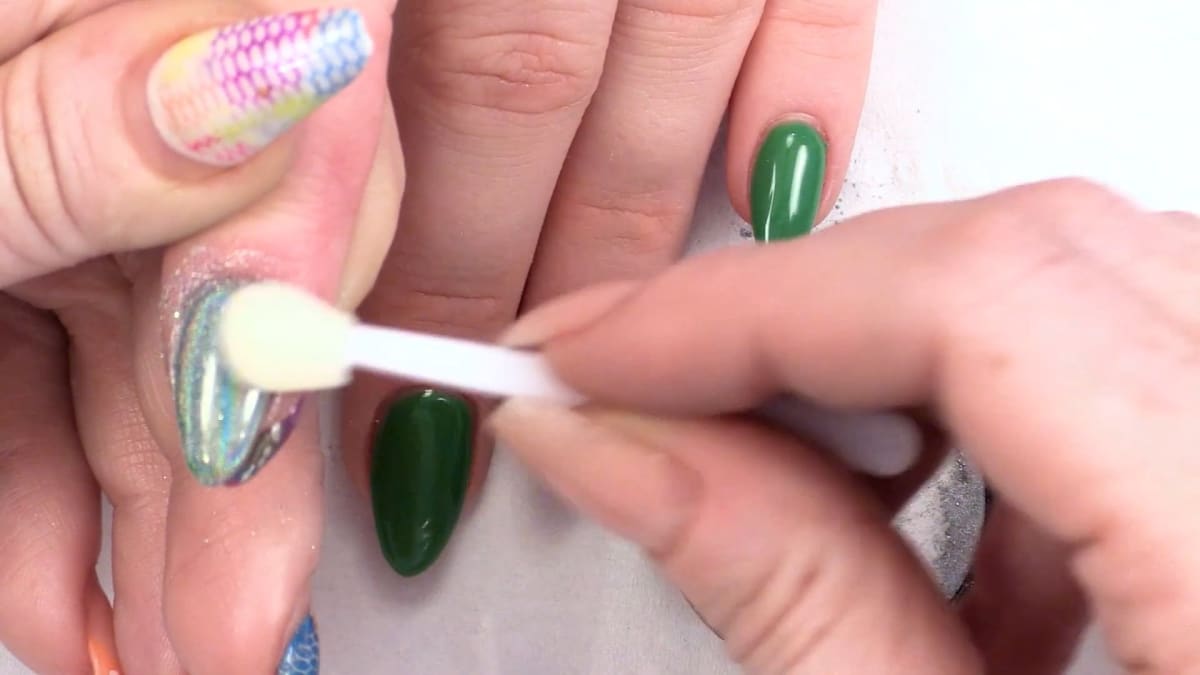
Tap a little pigment into the lid, pop some on a make up sponge applicator, tap it over the nail and then gently rub it in, which sits all the particles flat. You need the tiniest amount. Do all five nails. Watch this step at 3:50

5. Dust off
Use a soft make up brush with no make up on to dust off the excess pigment, which helps stop it sticking in your top coat.
6. Seal
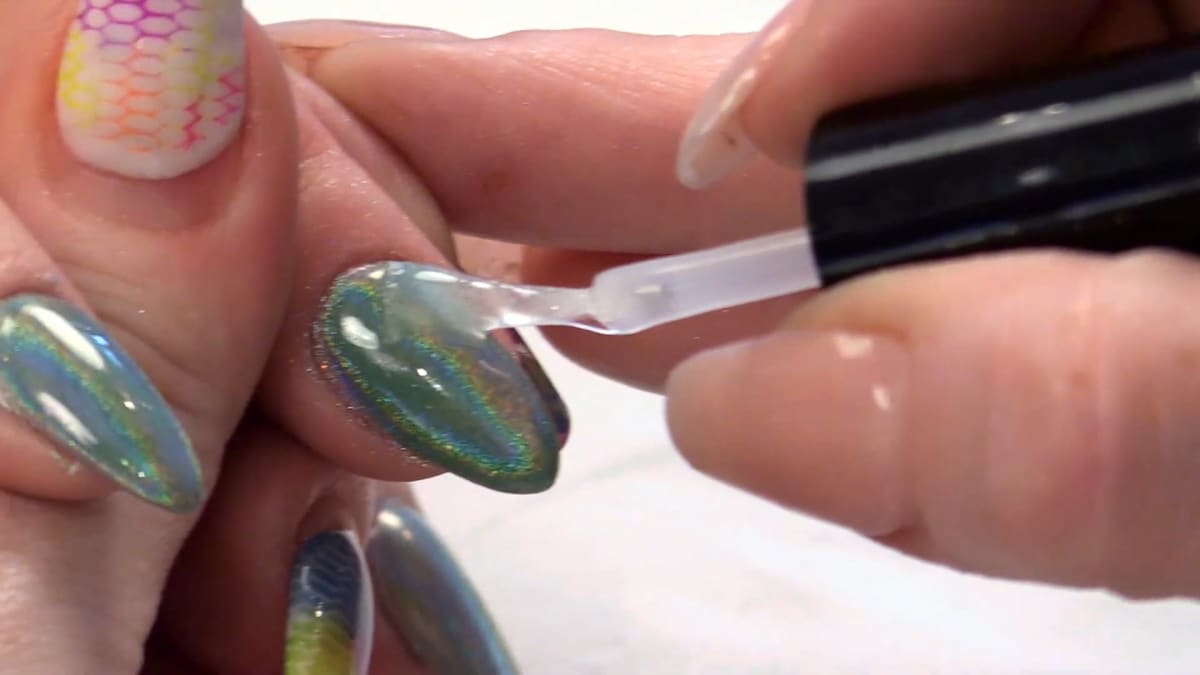
Seal with Top Coat, or Mega Gloss, going from the cuticle right to the tip. If you do not seal it, you will take the pigment off when you wipe. Cure. Watch this step at 6:35
7. Wipe and finish
Wipe over with Gel Residue Remover, giving it a good scrub to clean the excess off the skin and cuticle as well. Finish with cuticle oil all round the nail and finger.
Where to find each stage of the holo chrome nails video
| Stage | Time |
|---|---|
| Comparing base colours | 2:30 |
| The pigment powder | 3:50 |
| Tapping the pigment on | 4:15 |
| Rubbing the pigment in | 5:00 |
| The rainbow mirror effect | 6:10 |
| Sealing cuticle to tip | 6:35 |
Pro Tips
- Cover all the colour with top coat so the powder sticks everywhere.
- Use a lint free pad, not cotton wool.
- Seal everything from cuticle to tip before wiping.
Common Mistakes and How to Fix Them
- Bare patches in the chrome: the top coat missed that area, often the sides. Cover all of the colour before curing.
- Pigment wiping off: the seal was skipped or did not reach the edges. Seal from cuticle to tip, cure, then wipe.
- Specks in the finish: cotton wool leaves particles. Use a dry lint free pad, and dust off loose pigment before sealing.
Who Is This Design For?
Anyone who wants a quick, eye-catching chrome finish over their favourite gel colour. Holo chrome nails give a rainbow mirror effect without any nail art skills.
Ways to Make It Your Own
- Try it over nude, black, blue or green
- Use any colour of gel polish underneath
Aftercare
Rub cuticle oil in around the nail and finger.
Frequently Asked Questions
How do you apply holo chrome pigment?
Cure a top coat over the colour, remove the sticky layer with a dry lint free pad, tap the pigment on with a sponge applicator and rub it in, then seal.
Why use a lint free pad?
Cotton wool would leave particles on the nail.
Does the base colour matter?
The colour shines through, so you can use any colour.
How much pigment do you need?
The tiniest amount. Tap a little into the lid and pick it up from there.
Can you use Mega Gloss to seal?
Yes, but a top coat also helps clean the skin when you wipe.
Why did the pigment come off when wiping?
It was not sealed. Seal from the cuticle right to the tip and cure before you wipe.
Give Holo Chrome Nails a Try
Watch the video above and follow along with Kirsty to try this pigment.


